Identifying and describing the rocks collected by a dredge is one of the most important steps of a cruise. The scientists do their sample selection for geochronology and geochemistry based on these rock descriptions in order to address the research questions summarized on the main page of this website. In addition, after the cruise, the rocks not selected for immediate research go into a rock repository at Oregon State University (osu-mgr.org). Having them well documented with photos and descriptions will make them accessible for future research projects.
 Unfortunately, the samples collected from the seafloor often do not look like the nice, fresh basalts you may have seen in a science museum or in your petrology class. The rocks are sawed into about one-inch-thick slabs to expose the interior of the black Mn-encrusted surface of samples from the seafloor. The roughness of the sawed rock surface makes observations difficult, though, and the inside of the rocks is generally not fresh either but frequently altered by seawater seeping through the rocks. To make identifications even more of a challenge, our only tools on the ship are binocular microscopes with up to 30x magnification. But rock identification does not have to be a painful endeavor! Before you pledge to throw the samples back into the ocean, take a deep breath and don’t panic. This guide will walk you through the basics of rock descriptions, and by the end you will be a master rock describer.
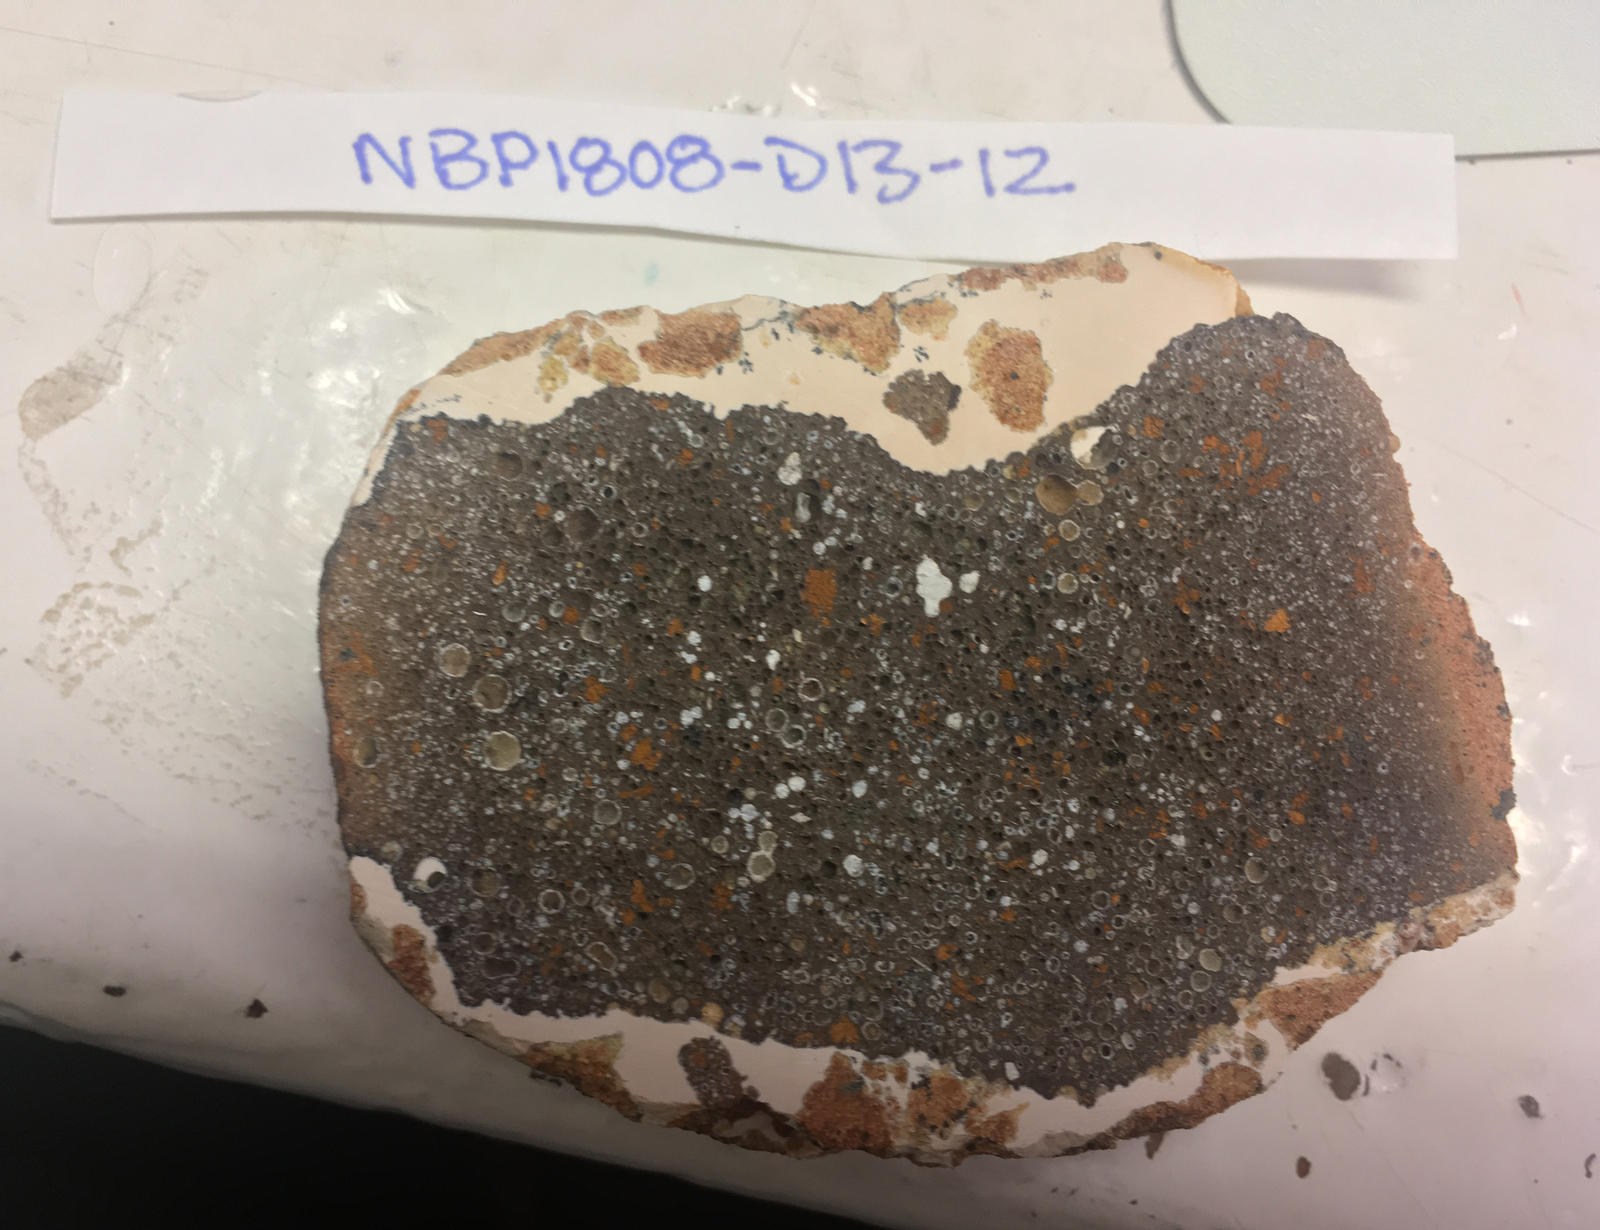
The first step in rock identification is to make general observations about the sample. The key is that we stick to what we can observe with our available tools and do not jump to interpretations. While general observations may seem simple, the best place to start in gathering evidence is describing the physical state of the rock, i.e. the color, how crumbly it is, etc. Those observations will later help you determine how altered the sample is. Other questions you can ask yourself at this stage are: does the sample have a black Mn-crust around it, and, if so, how does it look and how thick is it? Do we have one or multiple rock types in the sample?
As a next step, we make observations with a 10x magnification hand lens and ask what minerals make up the rock. When you peer down at the sample, do you observe any phenocrysts (mineral grains) greater than a millimeter, and if so, how many different types can you see? Can you discern what minerals are in the groundmass with just your naked eyes? … If you are not sure what I am talking about, then imagine a nice bowl of chocolate chip ice cream. The vanilla ice cream is the groundmass supporting the chocolate chip phenocrysts. Why do most of the rocks recovered by this cruise have this type of chocolate chip ice cream texture? They are volcanic rocks which started crystallizing as the magma was transported to Earth’s surface forming the phenocrysts (chocolate chips). The magma then cooled rapidly, forming fine-grained or glassy groundmass (the ice cream) depending on whether it erupted into air or water—eruption into water will cool a lot faster than into air.
Before we take an ice cream break, let’s get back to making observations about rocks… Are there any vesicles in the sample? Vesicles are pore spaces within the rock that form when magma moves towards the surface. Like bubbles forming when you open a soda bottle. In our example (Figure 1), one phenocryst really pops out—the bright orange phenocryst. There also appear to be small, elongated white minerals scattered around. As for vesicles, there are open vesicles, but about half of them are filled with a white mineral.
The next step is to make microscopic observations about the rock using the binocular microscope.
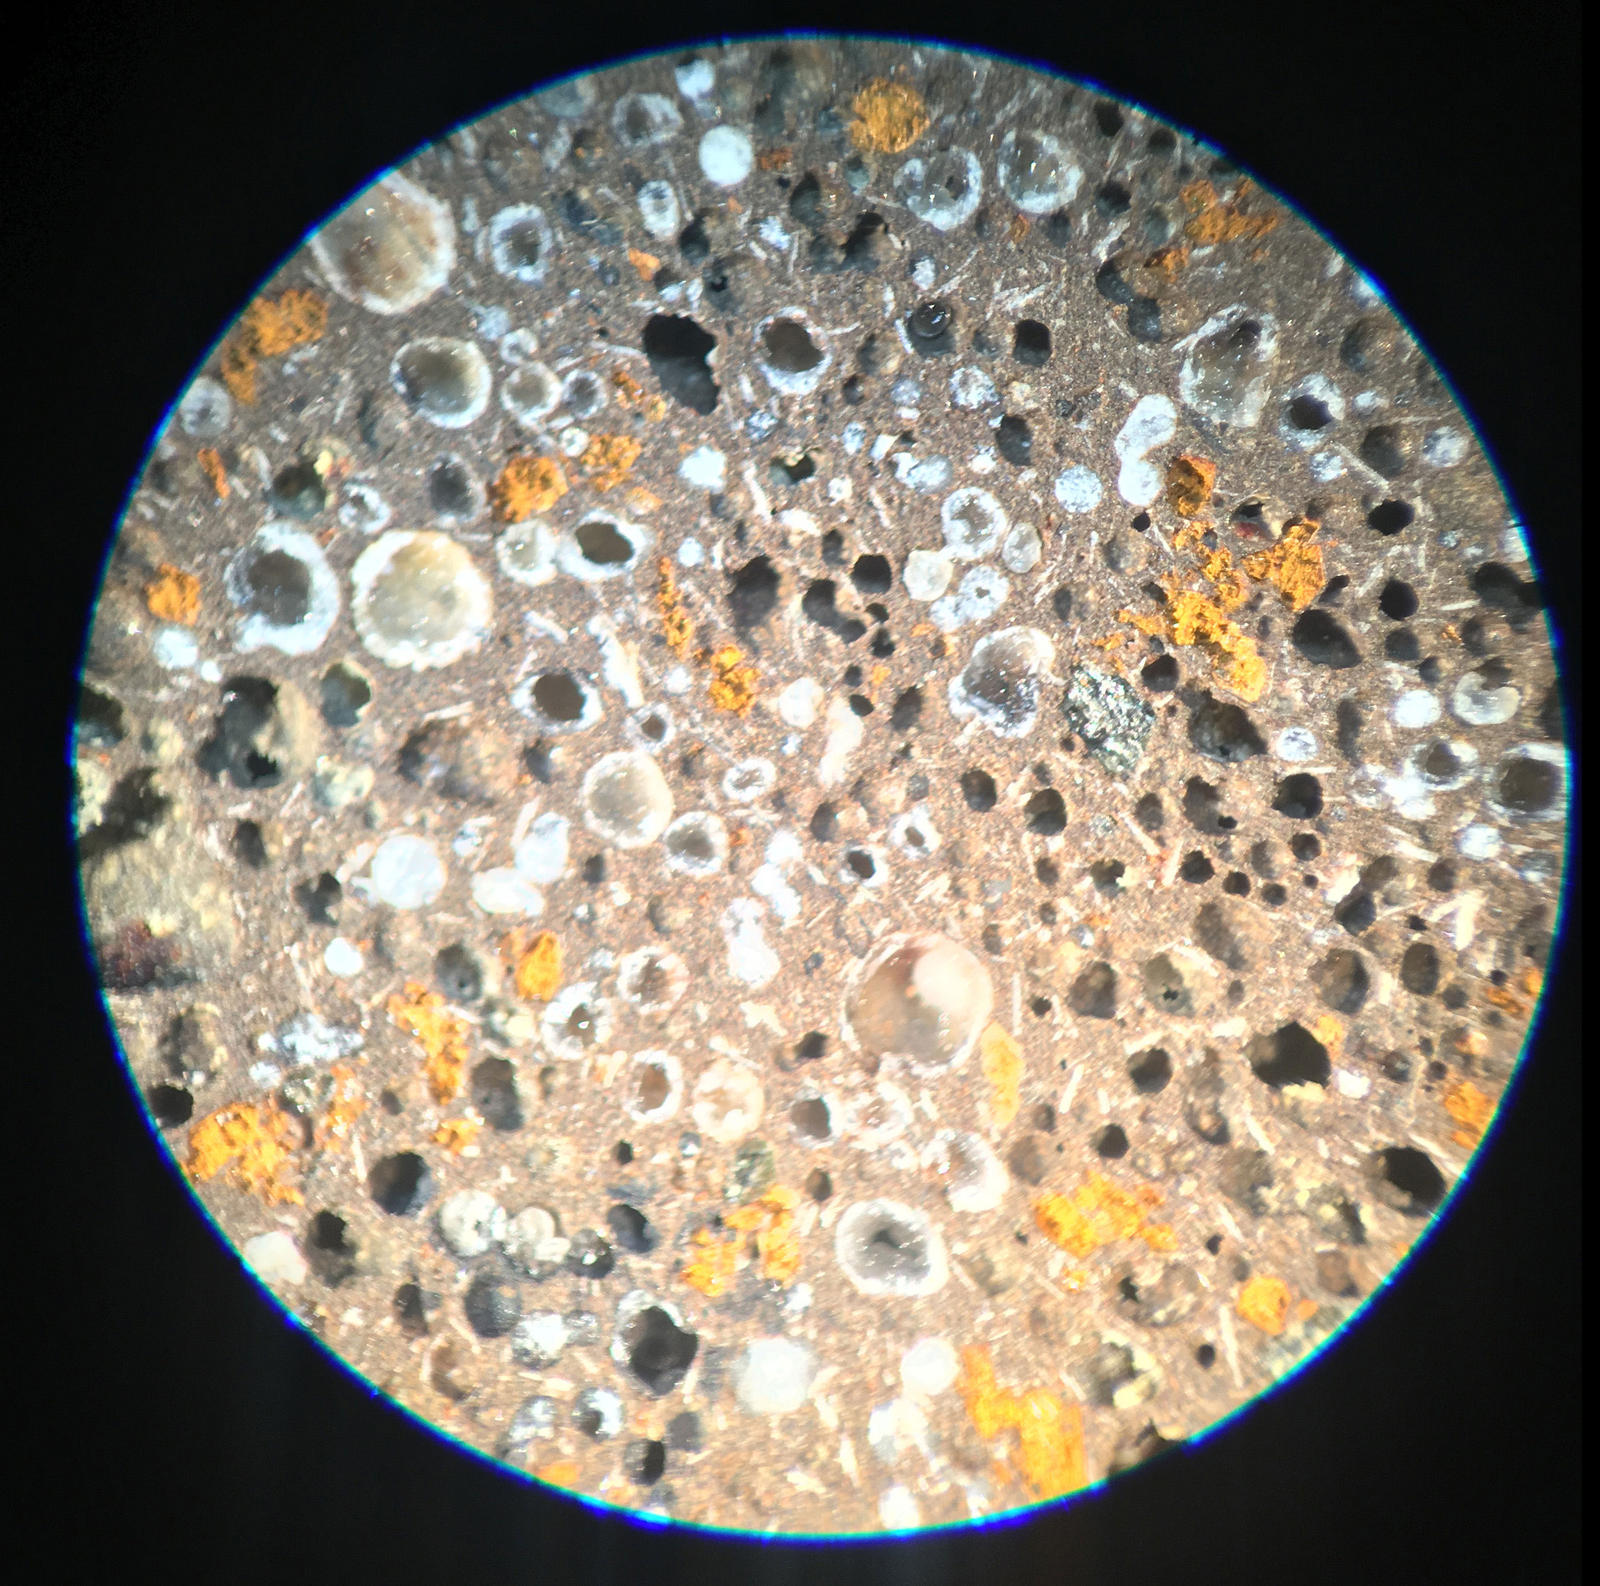
Let’s start with phenocryst identification. We had already observed that there are large orange phenocrysts in the sample. How do they look under high magnification? Do they look euhedral (crystal faces are visible), anhedral (rounded, embayed, broken…generally unhappy looking), or subhedral (somewhere in between)? Most of the orange phenocrysts are broken up, while some of the phenocrysts show some distinct edges (anhedral – subhedral). Now we can get to the actual identification of this mineral. If you’ve taken a mineralogy class, you may not have learned of many minerals that are orange and would make sense in an oceanic basalt. That’s where the seawater alteration of the basalt has to be considered. This mineral is (or was) olivine! We can identify it by its mineral shape on the remaining well-developed crystals, as well as the mineral it has altered to. Olivine alters to a mineral phase called iddingsite during oxidization or hydrothermal processes. Iddingsite is a combination of goethite/hematite (Fe oxides), clays, and chlorite. While the internal chemistry and structure of the olivine crystal changes, the external shape remains the same. This occurrence is known as a pseudomorph.
The elongate, white mineral we observed earlier is most likely plagioclase, a common framework silicate. We base this identification on the elongate crystal shape, the color, as well as the rarely visible twinning. When minerals twin, the crystal lattice in part of the crystal is oriented slightly different to the rest of the crystal. Are there any other mineral phases that we missed in our first observations? YES! We can actually observe a dark green-black mineral phase scattered around the groundmass that was not apparent without the microscope. This mineral is most likely a pyroxene based on the crystal shape and color. Now make your best attempts at figuring out the modal percentages (or how much volume of the rock that mineral inhabits) of each mineral phase in the sample.
 Determining what makes up the groundmass can be tricky. Most of the time the groundmass is too fine to get accurate percentages of the modal abundances of mineral phases without the aid of a microscope. This term is called aphanitic. Think back to our bowl of chocolate chip ice cream. The vanilla ice cream base in comprised of many different components—heavy cream, sugar, vanilla bean, etc. You know that there are multiple ingredients in the ice cream base, but you wouldn’t be able to separate them without using special tools. Instead, the matrix looks like a single entity. When the minerals in the groundmass are coarse enough to be observed with just your eyes, the term is called phaneritic. In our example, the groundmass looks very, very fine. Based on the color of the groundmass, we can also assume that the sample is only slightly altered. Try your best at determining the modal percentages. It is okay if your estimates are off by a few percent.
The last step is to make stray observations about the sample, like how the vesicles look. Are they elongate or spherical? Are they rounded or angular? What minerals fill in the vesicles? Is there volcanic glass in the sample, and is it altered? Finding fresh glass in a sample is a special treat! Because glass is amorphous (lacking a set crystalline structure), it is often the first phase to alter. We care about finding fresh glass because it provides a snapshot of the magma during different stages of crystallization. It is like seeing the ice cream before it is frozen. Our example unfortunately did not have any fresh glass in it, but around two dozen (!!) other rock samples from our dredges did!
After making some measurements of the size of the phenocrysts, vesicles, and groundmass minerals, you are done! Congratulations! You deserve a big bowl of ice cream! We’re definitely going to treat ourselves after describing all 925 samples from our 32 dredges. Now, go forth and describe!
By Ellyn Huggins (PhD student at the University of Nevada, Reno)
- 1141 reads