MagIC Help Library |
|||
MagIC Help Library |
|||
4.3.2 Import Menu
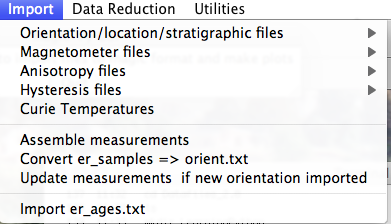
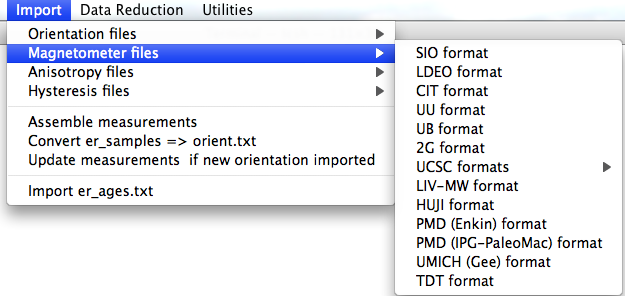
When you pull down the "Import" menu, you will see these options:
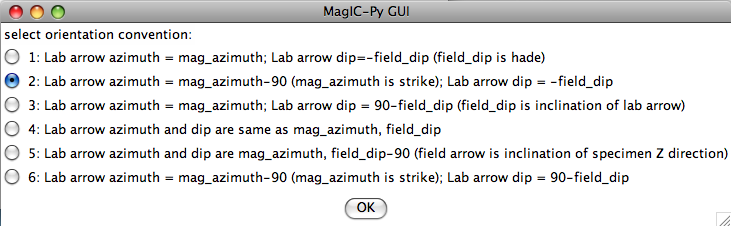
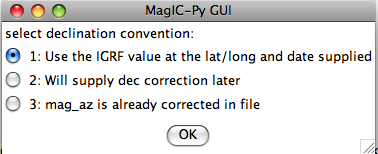
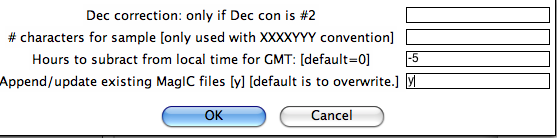
If none fit, then do the transformation yourself and provide the azimuth and plunge of the "X" axes used in your measurements and choose convention #4. Click on the "OK" button to advance to the next window. This will ask you about your preferences for correcting for magnetic declination. The declination used to correct your magnetic compass data will be recorded in the sample_declination_correction field of the er_samples table. If you set your magnetic declination correction to zero in the field and provided the date, latitude and longitude of the sampling location, you can request that orientation_magic.py calculate the declination correction from the (D)IGRF value. It uses the IGRF-10 coefficients which can be downloaded from the National geophysical data center website. Alternatively, you can supply your preferred value on a later page (option 2), or supply magnetic azimuth data that have already been corrected (option 3):
On the next page, you must select your naming convention. Note that for options #4 and 7, the number of characters that distinguish sample from site will be supplied on a later page. If none of these options fit your naming convention, put the site name under the column heading site_name in the orient.txt file. This can also be used to group samples that you wish to average together as a "super-site" mean, assuming that they record the same field state (averaging sets of sequential lava flows, for example.)
Often a the attitude of the rock units sampled for paleomagnetic study will be oriented multiple times. To average these, one would convert the bedding directions to bedding poles, take a fisher mean of the poles, then convert the mean bedding pole back to dip direction and dip. If you want to do that with the bedding information in the file you are importing, check the box "Take fisher mean of the bedding poles" in this window:
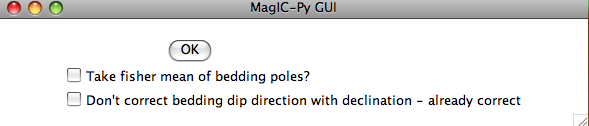
Check the box marked 'Don't correct bedding dip direction with declination....' if you corrected the bedding dip directions for declination already. (It is possible that the bedding dip directions be corrected while the sample orientations are not, for example if the bedding attitudes were read off an existing map...).
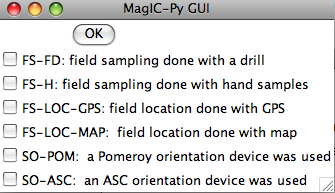
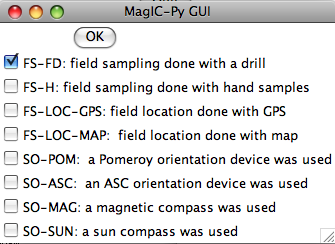
The next window allows you to select method codes that describe sample conditions. Select all that apply to all samples. Sample specific method codes can be attached within the orient.txt file itself.
After you get through all the windows, the MagIC.py GUI will generate commands which will appear on your command line prompt. It copies the orient.txt formatted file into the MagIC directory and calls the program orientation_magic.py. This program reads your datafile and parses the information into several MagIC tables (usually er_samples.txt, er_sites.txt, but also er_images.txt if you entered image information in the orient.txt file). If you indicated that you had multiple locations, it will append each subsequent import file to these same filenames. Check the terminal window for errors! If you can't figure out what went wrong, send a screen shot and the offending orient.txt file and I'll try to figure out what went wrong.
SIO formatted files: In the first window, choose the laboratory protocol from the following menu:
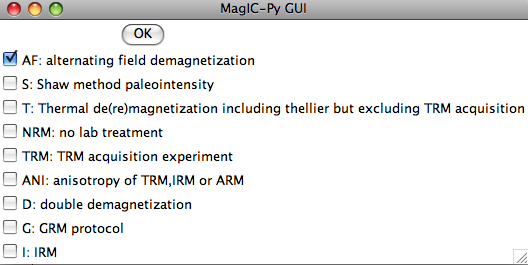
Check all that apply: AF indicates that the data are from an alternating field demagnetization experiment. If a double or tiriple (GRM) demagnetization protocol was followed, also check the D and G boxes. For thermal demagnetization and also double heating paleointensity experiments, check the 'T' box. Do not check this box, however, if the data are from a TRM aquisition experiment (multiple field steps with total TRMs). If these data are some form of anisotropy experiment, check the ANI box and if they are IRM data, check the IRM box.
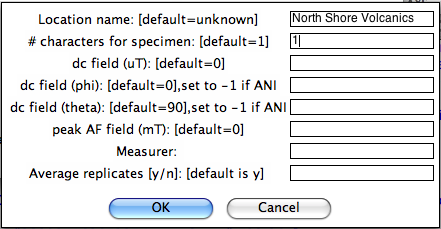
Enter a variety of important information in the next window:
Now you must choose your naming convention. NB: All specimens must have the same naming convention within a single file. After collecting all the required information, MagIC.py generates a call to the program mag_magic.py which sorts the measurement data out into the MagIC format. Each imported file is stored as a file of the same name as the input file, but with .magic appended to the end. Check the terminal window for errors. It will also let you know about all the averaging that has taken place - these comments are not errors. After all the measurement files have been imported, select "Assemble measurements" from the Import pull down window. You are now ready for "Data reduction".
Other formats:
LDEO format:
CIT format:
UU format:
UB format:
2G format: To use this option, first place all the 2G binary .dat files in a separate sub-directory within your MyFiles directory. All the files in a given sub-directory must have the naming convention, sampling meta-data and location name. You will first be asked to specify the directory to import and then the naming convention (see instructions for .PMD files below). Be sure to assemble your measurements before attempting to make plots from them.
UCSC format:
LIV-MW format:
HUJI format:
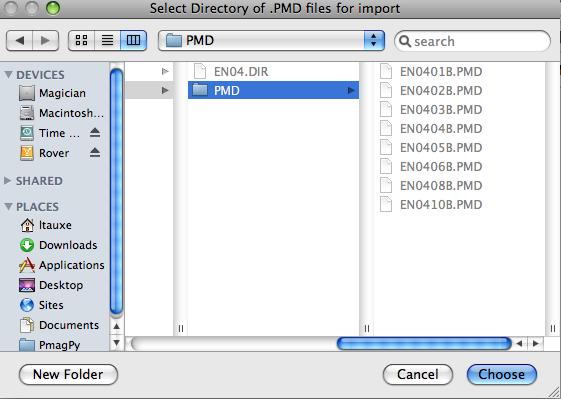
PMD (ascii) format: To use this option, first place all the .PMD formatted file in a separate sub-directory within your MyFiles directory. All the files in a given directory must have the same naming convention, sampling meta-data and location name. You will first be asked to specify the directory to import:
Then you will be asked to specify the naming convention that you have used. Additional information can be supplied in the table:
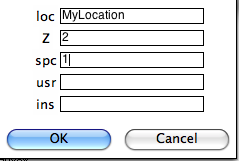
Notice that because if you specified naming conventions #4 or #7. (e.g., specimen EN0401B is from sample EN0401 and from site EN04), we must supply the number of characters designating sample from site here (2), as well as the number of characters designating specimen from sample (1). We can specify some of the sampling conventions using the magic method codes on this page:
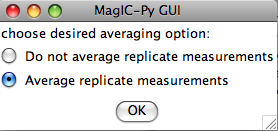
Normally, you should elect to average replicate measurements at a given treatment step, but some studies you may not want to, so you are given the option here:
If you have already imported orientation information and created a file called er_samples.txt, the program will ask you if you want to append this information to that file (updating any existing sample orientation information in the process) or to create a new file, overwriting all existing information. This option allows you to keep .PMD files from separate locations in different directories, uploading them separately and combining all the information together into your er_samples.txt and magic_measurements.txt files. When you are finished uploading measurement data, select the Assemble Measurements option so that you can plot the data.
PMD (IPG-PaleoMac) format: You will first be asked to specify the import file, then you will be asked to specify the naming convention that you have used. Additional information can be supplied in the table:
Normally, you should elect to average replicate measurements at a given treatment step, but some studies you may not want to, so you are given the option here:
If you have already imported orientation information and created a file called er_samples.txt, the program will ask you if you want to append this information to that file (updating any existing sample orientation information in the process) or to create a new file, overwriting all existing information. This option allows you to keep files from separate locations in different directories, uploading them separately and combining all the information together into your er_samples.txt and magic_measurements.txt files. When you are finished uploading measurement data, select the Assemble Measurements option so that you can plot the data.
TDT (ThellierTool) format: This option allows input of the ThellierTool format for double heating experiments. You will be asked all the usual questions regarding the directory in which the .tdt files reside, the naming convention, and the location name. Be sure that each directory contains files with the same location and naming conventions. MagIC.py will copy each file into the MagIC Project directory and generate a command to the program TDT_magic.py which does the conversion to a magic formatted measurement file. When you are finished, select "Assembls Measurements" and proceed to viewing of Thellier data under the "Data Reduction" menu.
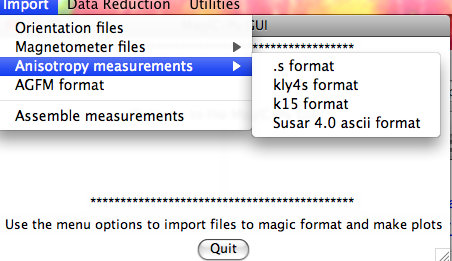
All options generate commands, depending on the file type, which create MagIC formatted files, in particular the rmag_anisotropy.txt format file which is used by the plotting programs for AMS (see Data reduction).
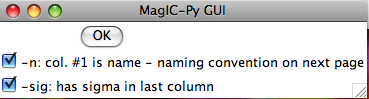
.s format: This option imports .s formatted files. After choosing the file for import, the GUI will allow you to specify if you have the specimen name in the first column and a sigma value in the last:
KLY4s format: This option imports KLY4s formatted files. These files are essentially enhanced .s files and this option has enhanced features. If you have imported orientation information it will do the transformations from specimen to geographic and stratigraphic reference frames which can then be plotted with the anisotropy plotting options. If you have not imported orientation information, the program will complain, but go ahead with the importation - note that the other reference frames will not be available until you re-import the KLY4s file. You will be asked to specify your naming convention and supplemental information:
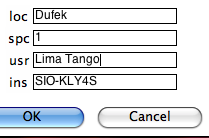
Type in your "location" on the line labeled 'loc', the number of characters used to differentiate between specimen and sample, who made the measurements (optional) and on what instrument (optional) in the "usr" and "ins" lines. The GUI first copies your data file into the MagIC project directory and then constructs a call to kly4s_magic.py on the command line. Check the terminal window for errors! Be sure to "assemble measurements" before attempting to plot your data.
K15 format: This option imports K15 formatted files. These files have the orientation information embedded in them. If you have not already imported orientation information for a particular sample, the embedded information will be added to the existing er_samples.txt file. If none exists, a new er_samples.txt file will be created. You will be asked to specify your naming convention and usual supplemental information. Type in your "location" on the line labeled 'loc', the number of characters used to differentiate between specimen and sample, who made the measurements (optional) and on what instrument (optional) in the "usr" and "ins" lines. The GUI first copies your data file into the MagIC project directory and then constructs a call to k15_magic.py on the command line. Check the terminal window for errors! Be sure to "assemble measurements" before attempting to plot your data.
SUSAR ascii format: This option imports SUSAR ascii formatted files. These files have the orientation information embedded in them. If you have not already imported orientation information for a particular sample, the embedded information will be added to the existing er_samples.txt file. If none exists, a new er_samples.txt file will be created. You will be asked to specify your naming convention and usual supplemental information. Type in your "location" on the line labeled 'loc', the number of characters used to differentiate between specimen and sample, who made the measurements (optional) and on what instrument (optional) in the "usr" and "ins" lines. The GUI first copies your data file into the MagIC project directory and then constructs a call to k15_magic.py on the command line. Check the terminal window for errors! Be sure to "assemble measurements" before attempting to plot your data.
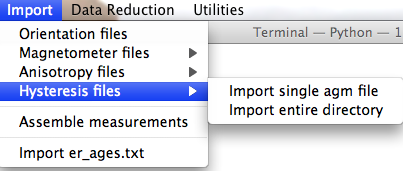
When you expand the "Hysteresis files" menu, you are presented with several choices:
Import single agm file: This option constructs a call to the agm_magic.py program. You will first be asked to select the file for importing. This file can be in either the old or the new format - the program can figure out which automatically. Then the program requests that you select the most appropriate naming convention. These relate sample names to site and location names. The first five options are useful if there is a simple relation ship between sample and site names and all the files come from a single location. Option #6 allows you to have more complicated relationships between samples, sites and location names by specifying these "by hand" in an er_samples.txt file in your MagIC project directory. If you imported orientation information using an orient.txt file, by specifying the site name for each sample under a column labeled site_name, and importing multiple orient.txt formatted files for the individual locations involved in the study, your er_samples.txt file will already be available to you for this option. The final option is for "synthetic" specimens. Choose this if there is no "site" or "location" information and the sample is only of rock magnetic interest. Next you will be asked for additional information, for example, location name, number of characters that distinguish specimen from sample, the specimen name, etc.
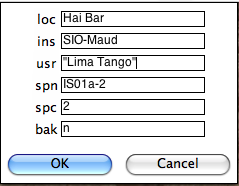
Check your terminal window for specific definitions. Note that agm_magic.py assumes that the input file name had the specimen name as the root, but you can change the specimen name on the line labelled 'spn'. In this example there are two characters that distinguish the specimen (IS01a-1) from the sample (IS01a) and the naming convention was #1 (IS01a is a sample from site IS01). The program copies your data file into the MagIC project directory and calls agm_magic.py with switches set by answers to the queries set by the GUI. The actions can be viewed in your terminal window. agm_magic.py will create an output file with the same name as your input file, but with the .magic extention and write this file name to the measurements.log file. Note that if this is a "backfield" IRM experiment, you should type 'y' into the data entry window on the line labelled 'bak'.
Import entire directory: This option is very similar to the "single agm file" option described above - but allows automatic import of all files within a specified directory. The differences are that all files must have the specimen name as the file name root, and they must all have the same naming convention as you will only be asked once for all the information.

It is very important that you attach the proper method codes to your age information, so check the "Geochronology Methods" options carefully. Also, you will want to include the proper references in the er_citation_names field. You can add the citation information within the MagIC Console after your data get imported into it. To import the age file into the MagIC project directory, place the er_ages.txt file in your MyFiles directory and select the "import er_ages.txt" option in the Import menu.
See also ...
Contents MagIC Chapter 4 Importing Data With PmagPy and MagIC.py Topic 4.3.1 File Menu Topic 4.3.3 Data Reduction Menu Topic 4.3.4 Utilities Menu