ArArCALC Help Library |
|||
4.1 Microsoft Office
In this section special tasks that you sometimes may need (or want) to carry out in Microsoft Office and Excel will be discussed. These tasks mainly are dealing with important Security Settings or the installation of some special Microsoft Software Libraries.
4.1.1 Changing Security Settings
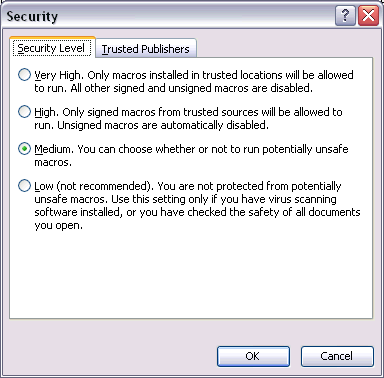
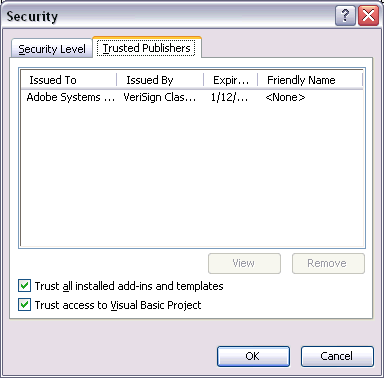
The ArArCALC software uses macros written in Visual Basic for Applications (VBA) for Microsoft Excel. In general, these kind of macros may also provide a security risk, if being used for hacking purposes. To circumvent any risk of opening files that may contain certain malicious software code, Microsoft Excel takes some (default) security measures to protect its users. For example, when you install the Microsoft Excel software for the first time, it does not allow you to open any file that has VBA Macros attached to it, like ArArCALC. In addition, it will not trust (how nice) the Visual Basic Project provided by ArArCALC. So, to enable ArArCALC to run on your computer, follow these instructions:
4.1.2 Trusting Access to Visual Basic Project
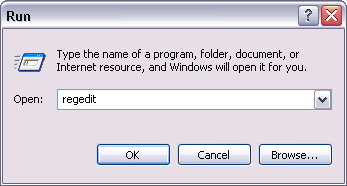
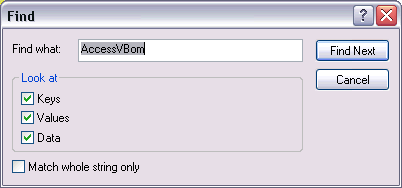
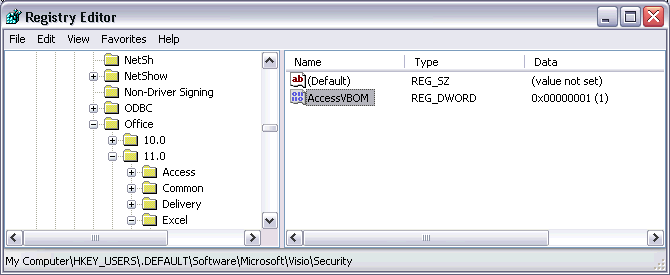
If you are using Microsoft Excel 2002 or 2003 you may encounter difficulties checking the Trust access to Visual Basic Project checkbox in the Security Dialogbox (see also: Changing Security Settings). In some cases, the latter checkbox is grayed out on the Trusted Sources page (which is not the case in the example below). However, this checkbox always should be checked, otherwise you cannot startup and run ArArCALC. To make this checkbox active again, you should follow the instructions below:

4.1.3 Installing Microsoft Office with Web Components
When installing Microsoft Office Excel not always the Office Web Components get installed. Only in Microsoft Office 2000 the web components are installed during a standard installation. In all other versions, this depends on the type of the Microsoft Office package you are installing and the options selected during the installation. Follow the instructions below when installing Microsoft Excel for the first time. Follow the same instructions when you want to include the Office Web Components after you installed Microsoft Excel.
First Time Installation
Insert the CD-ROM or DVD in your computer and follow the installation instructions. Be certain to select the option to carry out a Custom Installation.
Updating an Existing Installation
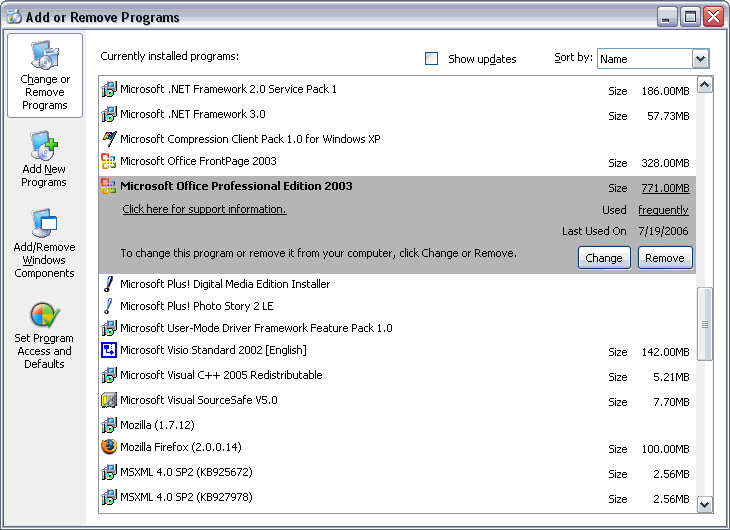
Go to the Control Panels via the Windows Start Button and start the Add or Remove Program. From the list of currently installed programs select the version of Microsoft Office (or Excel) that you like to update. Click the Change button.
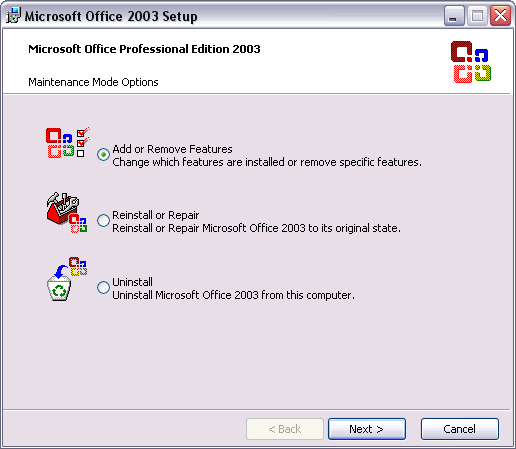
In the next window select to Add or Remove Features. Click the Next button.
Ensuring Complete Install with Web Components
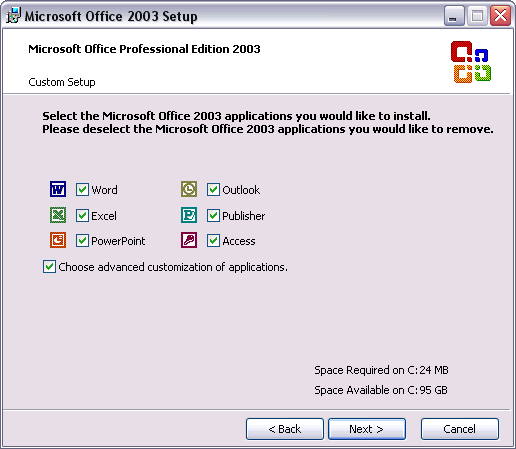
Now make certain that you have selected the Choose Advanced Customization of Applications checkbox. This is required if you want to carry out a complete install. Click the Next button.
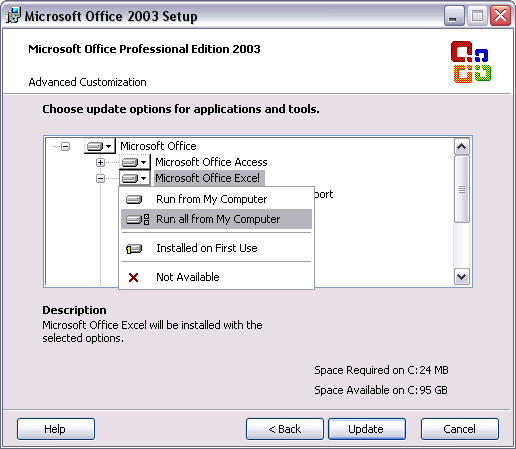
In the list of applications and tools locate Microsoft Office Excel and select the Run all from My Computer option from its pulldown menu (see below). Scroll even further down this list to find the Microsoft Office Shared Tools. Expand this list item, locate Office Web Components and again select the Run all from My Computer option from the associated pulldown. Click the Update button to finish the installation.
4.1.4 Adding Office Web Components (OWC) after the Microsoft Office Installation
The Degassing Patterns and Import Procedure Blank toolboxes require (and assume) that a recent version of Microsoft Office Web Components have been installed on your computer. In most distributions of Microsoft Office these components are installed, in particular, if you have performed a complete installation of Microsoft Excel. Only in Microsoft Office 2000 the web components are installed during a standard installation. In all other versions, this depends on the type of package you are installing of Microsoft Office and the options selected during the installation (see also: Installing Microsoft Office with Web Components). If the web components are not available, you will be presented with an error message in ArArCALC while trying to display some of the toolboxes with embedded charts.

Download the OWC10.exe or OWC11.exe file from one of the appropriate links below to install the web components for Microsoft Office XP or 2003:
Follow the instructions from the Microsoft Download Center web page in order to install the web components on your computer. After the install you should find that the following files have been installed on your computer:
Office 2003
Office XP
Office 2000
Restart Microsoft Excel, which automatically installs the web components.
4.1.5 How to Insert Symbols in Microsoft Excel
When entering data into dialogboxes (for example: Sample Parameters) or when editing your input data in the ArArCALC data tables (see also: Editing Data in ArArCALC), you sometimes need to insert Special Symbols, like the "µ (mu)" or "º (degree)" characters. This is easiest done by applying the Alt+0000 Shortcut Keys as listed below:
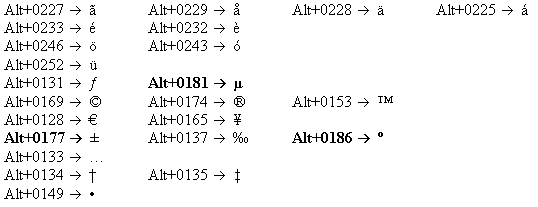
While typing in your text entries, simply hold down the Alt Key and type in the Four Numbers without releasing the alt key. This will insert the required Special Symbol at the place of the cursor. For a complete list of possible Alt+0000 Shortcut Keys please visit http://www-1.ibm.com/support/docview.wss?uid=swg21089251.